System Options - Timesheets
This area specifies how the timesheets will operate in kiosk. This is set up by the HR3 consultant as part of the system implementation process. Therefore, as settings should not need to be changed, this is an overview only.
Note that if you make any post-implementation changes to the Timesheet setup, the changes will not be applied to any timesheets that already contain data. For example, if you have timesheet data entered for the current week, but no data entered into next week's timesheet, the setup changes will not be applied to the current timesheet, but they will be applied to next week's timesheet.
Therefore consideration should be given to the timing of making the changes.
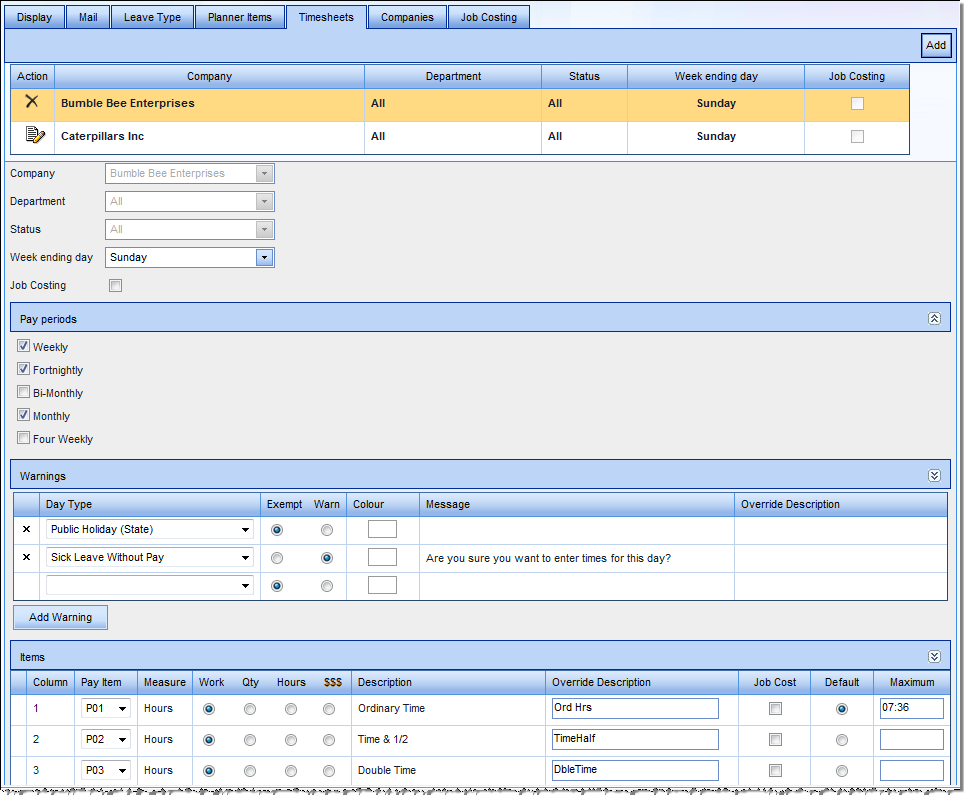
The Timesheet tab displays the company names available to the system, with Departments and Status:

If you want to check or amend settings for timesheets, click Edit:  to the left of the company name. This will expand the screen and display edit sections for Pay periods, Warnings, and Items.
Job Cost
If Job Costing is in use, this will show as a tick in the top grid to the right of the company name. Job Costing can be activated in Items by ticking this box. However, we recommend that you discuss this with your HR3 consultant, or contact HR3 Support, to ensure the process is completed correctly.
Pay Periods
This indicates who will be using this timesheet. This example means that staff who are paid weekly, fortnightly and monthly will all use this timesheet.
Warnings
- Warnings and exemptions can be added to the timesheet. Once you have completed one line, you can include another warning or exemption - click
 to display a new blank line .
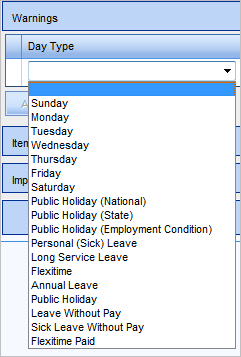
Using our example (illustrated above), staff would not be able to add hours for any State Public Holiday (Exempt), and a warning would be displayed if they try to add working hours for time when they are on sick leave without pay (Warn). - You can apply Warnings to these options, as required:

- The warnings you apply must be appropriate to the staff using this timesheet. For example if you have staff who work Saturdays or Sundays, you would not want to display a warning if they try to add hours for these days.
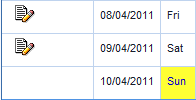
- If preferred, choose a colour to apply to any day that is the relevant Day Type on the timesheet. For example you might want Sundays to be highlighted as yellow (as well as Exempt). This will display on the timesheet like this:

- When you select Warn for a new entry, the default warning is displayed in Message. If you do not want to use this message on the timesheets, enter new text in Override Description.
- Warnings and exemptions can be deleted by clicking the x to the left of the relevant row.
Items
This displays the pay items to which hours worked can be applied. The example showing ordinary time, time and a half, and double time, would be a typical setup.
- When the hours worked for a Pay Item is to be calculated on the timesheet, the Work option should be selected. These are the hours that make up the pay for the relevant time period. As Work invokes the calculation, if you do not want hours to be calculated choose Hours instead.
- Qty, Hours and $$$ are units of measure, so this will affect the format of the data entries on the timesheet.
- Pay items which are 'each' should be $$$, or occasionally Qty.
- Pay items which are 'hours' should be Hours
- Pay items which are 'days' or 'kilometres' should be Qty
- The Pay Item codes will display on the Timesheet unless you enter preferred text in Override Description.
- If a pay item is the default item for hours worked, check the Default option for that pay item, and if this default pay item has a standard maximum hours per day, enter this value in Maximum.
Return to Admin Menu


